Wen and I are gearing up for a massive trip and she wanted a blog that has a map as the main page. The idea is that you can click on the map and see the corresponding posts.
It turns out that this is actually fairly straightforward to do; here's a quick tutorial.
Step 1: Get a Wordpress Blog
This might work for other blogs, but I'm only familiar with the Wordpress platform. I'm assuming you've got one from here on in.
Step 2: Set up your Blog so that it Loads to a Page, not a List of Posts
Normally when your blog loads, it shows the 10 most recent posts that you've created. However, our plan is to create a map that will always be there when the blog loads. You can set this up via the "Reading" tab underneath "Settings".
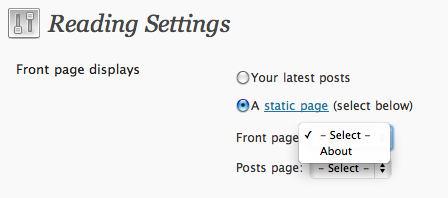
Later on we'll change the text of this page so that it contains a map.
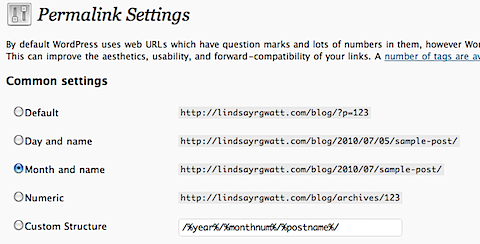
Step 3: Set up your Blog so that it Shows Friendly URLs
Next step is to make sure that your blog is showing friendly urls. (This means the URL of a page is something like yourblog.com/post/07/2010/my_post.html, not yourblog?post=341). You can set this up via the "Permalink" tab underneath settings.
Take a look at a couple of posts and a couple of different categories so that you can see what the different URLs look like. You're going to add these to the map you'll be creating.
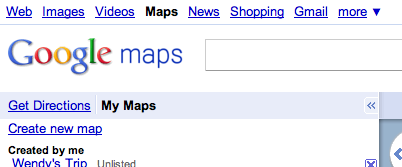
Step 4: Create a Map of Where You're Going
Next, go to Google Maps, sign in (you'll need a Google account), and click on "My Maps" to create a new map:
Click "Create new map" and put in a new name. Then drop a marker on a place on your trip:
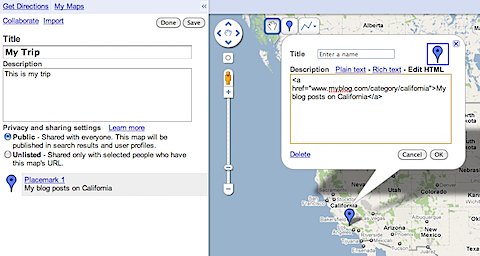
When the marker loads, select "Edit HTML" and then enter something similar to following:
\<a href="http://www.myblog.com/category/california">My blog posts in California\</a>
What you're doing is making each of the info windows on the Google Map link to either a page or a category of pages on your blog.
For instance, if you had a category called "California", the link would be "http://www.myblog.com/category/california". When a user clicks on this link, they'll see all the posts relevant to that part of the map.
Step 5: Get the URL of your Map
Once you've created all your locations, save your map. Then, click on "Link" on the right side of the map:
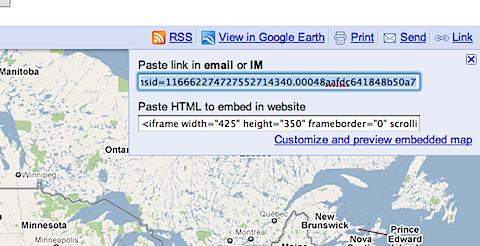
We're going to embed this map on the page you specified in Step 2. The trick is to set up the map so that it shows the right location and has the correct width for your blog.
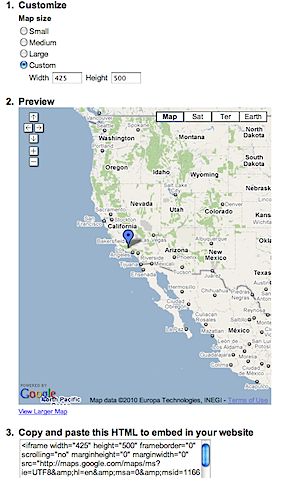
You'll have to play around with your blog to see what the right width is (when you've finished the tutorial, you'll see if the width if too wide/skinny). Start with 425 pixels (the default) and you can work your way up/down. The proper width will depend on the template you're using.
As for the location, you can control this by clicking on the "Customize and preview embedded map" link. Pan/zoom the map and set it to a custom width/height that works for you:
Once you're ready, copy all the text in that box at the bottom of the page.
Step 6: Paste the Code onto your Page
Now, go to that page from Step 2 and paste the html from the above step into the page. Make sure that you're using the "HTML", not "Visual" editor:
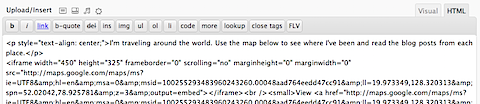
Save the page and publish it. Now, when you load your blog, you should see your map. When someone clicks on the map, an info window will pop up; when the click the link, it will go to the right page on your blog.
Known Limitations
- If you update your map, the new locations will appear automatically the next time someone loads your blog. However, if you want the map to open at a different location (say, Japan, instead of California), you need to go back to Step 5 and paste that link in again
- If you edit your page from Step 2, the iFrame will disappear. You'll need to re-paste in the html from Step 5. This seems to be a Wordpress issue without a workaround.