If you get excited by maps and places, here's a reasonably common problem:
- I've got a set of locations (e.g., landmarks)
- I've got another set of locations (e.g., points of interest) and those points have additional metadata (e.g., a star rating for each place)
- I'd like to find all the points of interest with at least a certain star rating that are within a fixed radius of my landmarks
I want to walk you through one way to solve this problem. (And you can find all the files in this Github repo).
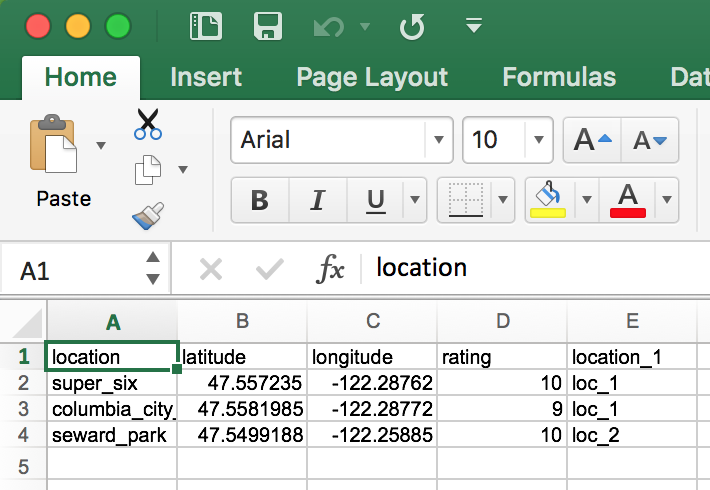
Step 1: Get your data
I'm starting with two .csv files: base (my landmarks) and nearby (my points of interest). Each contains a name of a place, a lat/lon and, for nearby, a rating:
Base
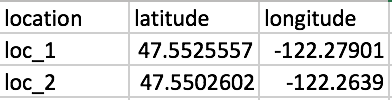
Nearby
Step 2: Create your QGIS project
Open up QGIS and create a new project. I want to measure distance in meters and the locations I'm using are in the United States to I have set my default QGIS projection to EPSG 2163 - which is measured in meters. This is going to be critical: if you use a projection like EPSG 4269 (NAD 83) then you'll end up doing all your work in degrees - which is meaningless.
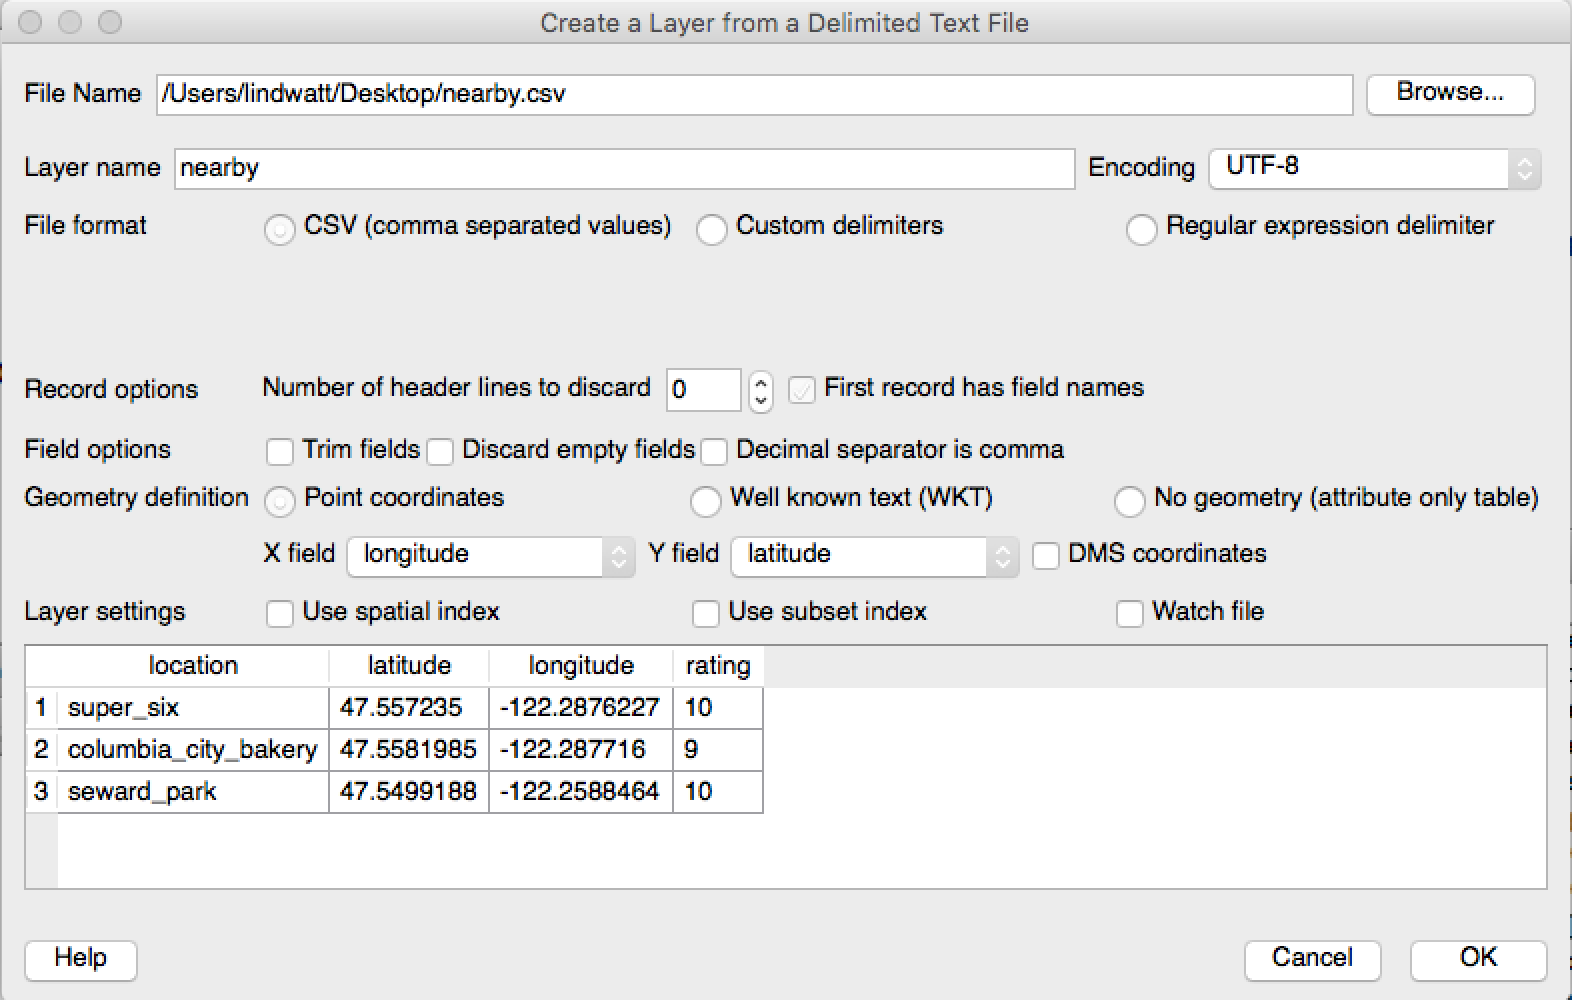
Step 3: Import your .csv files as new layers
Use the command Layers >> Add Layer >> Add Delimited Text Layer. Use "Browse..." to locate the files and import similar to the image below:
After you import both files, you should have a (boring) map like the following:
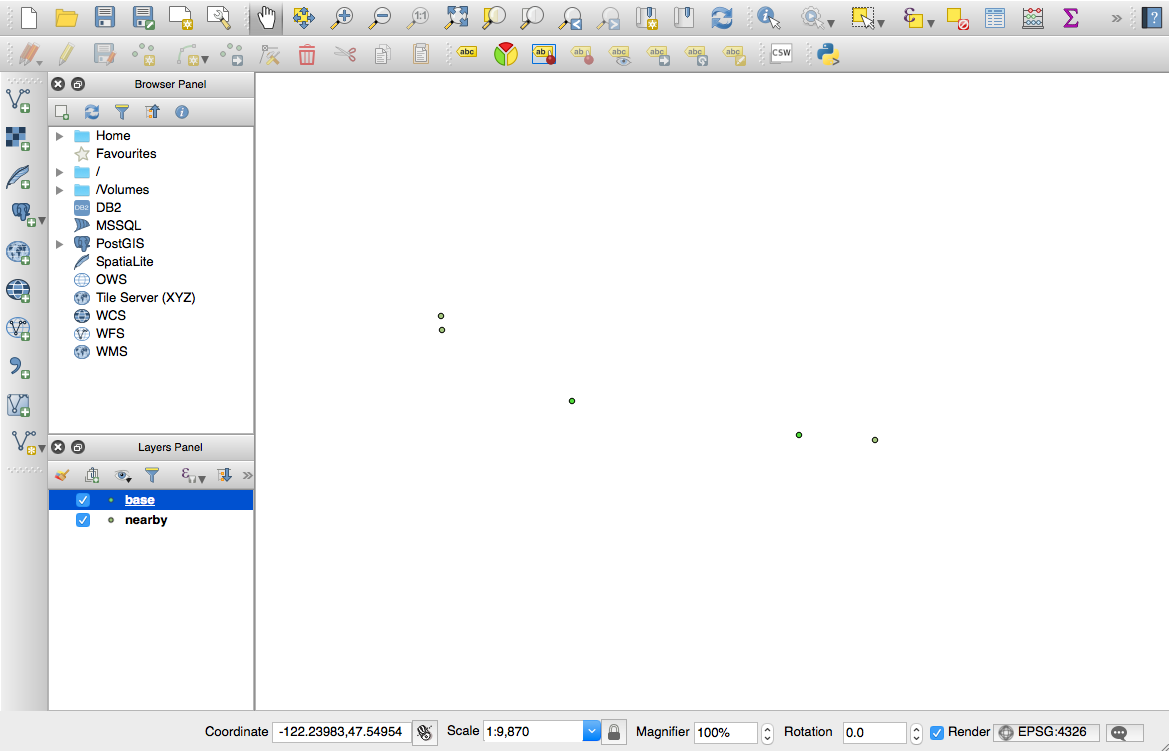
Here's a key thing to understand: your .csv files did not have a projection associated with them so QGIS adds the default of EPSG 4326 - which is in degrees, not meters. We need to fix that.
Step 4: Convert the layers to EPSG 2163
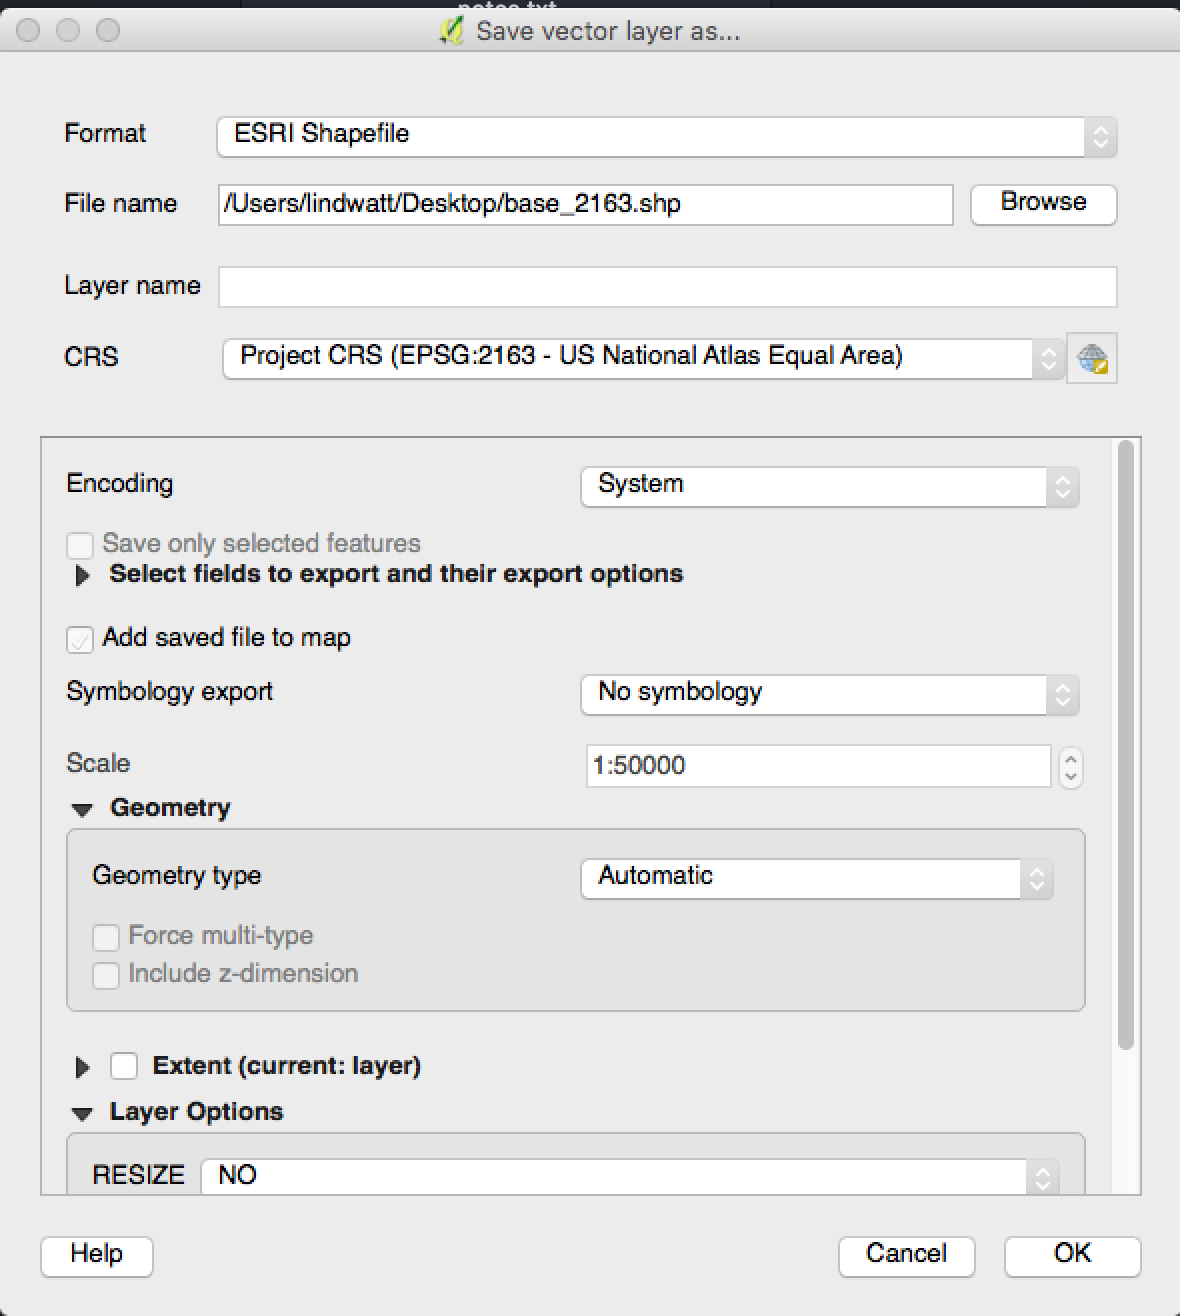
Right click on the name of each layer and select "Save As...". Make sure you set the file name of the new layer and change the CRS to EPSG 2163. I also end the name of my files in the coordinate system (e.g., base_2163) so that I can remember it unprompted.
Step 5: Start a new QGIS project
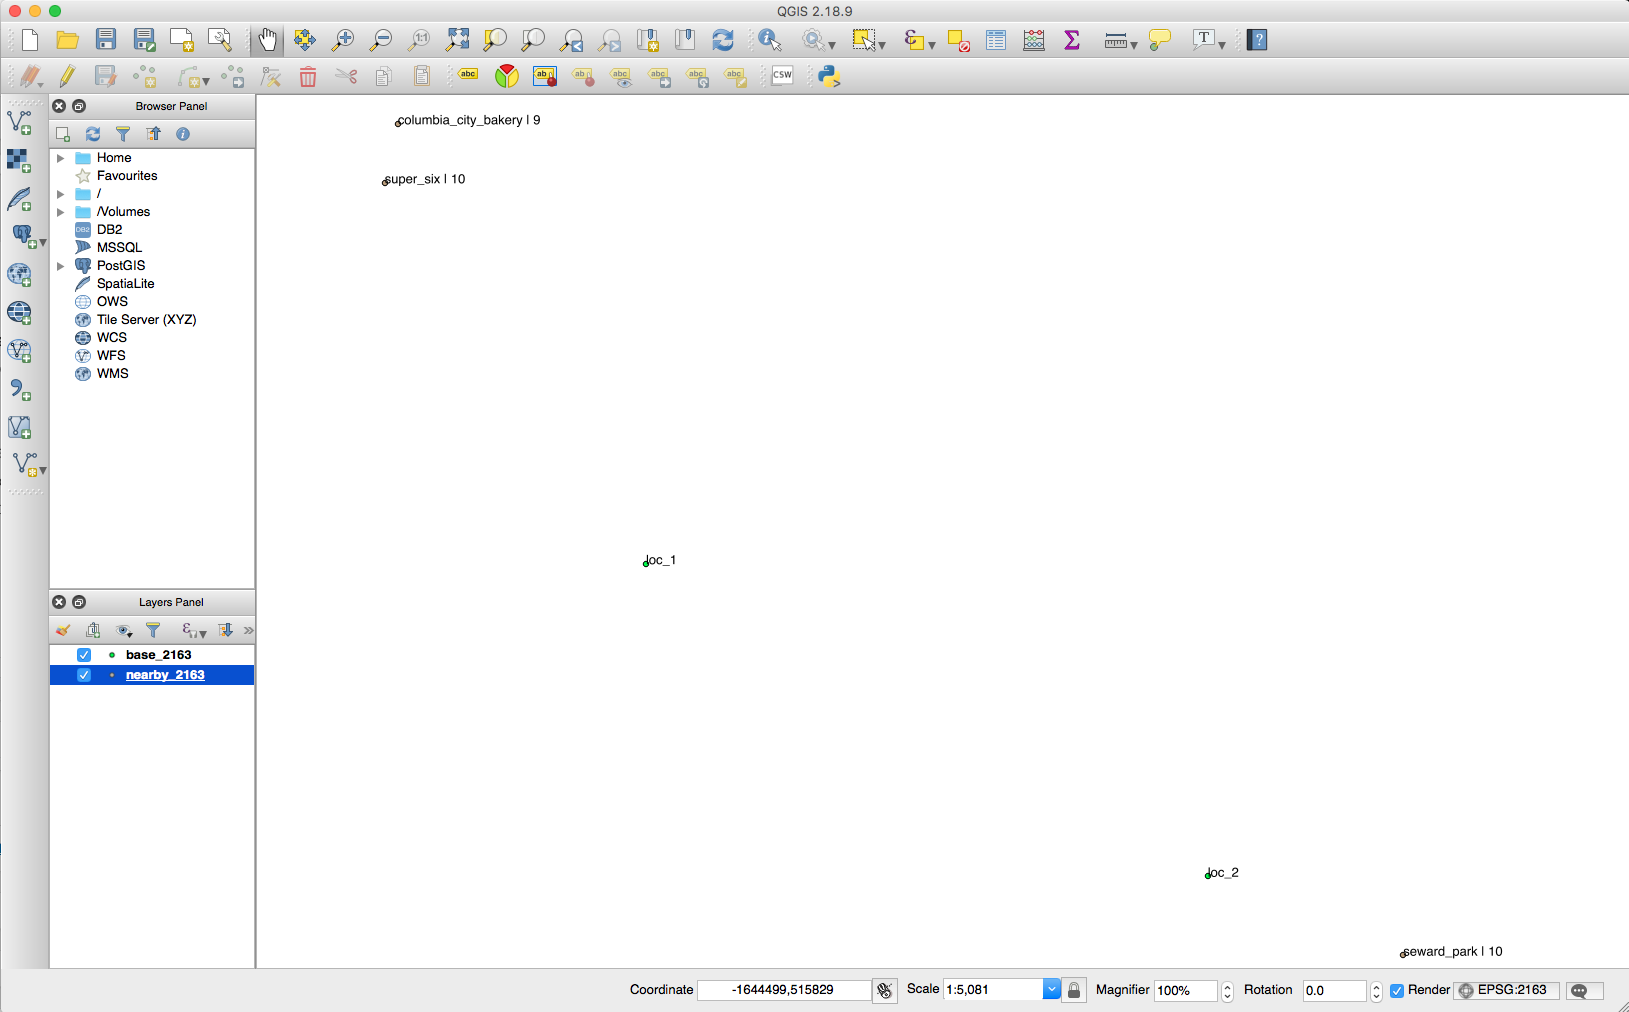
I now start a new QGIS project so that I can be in the correct coordinate reference system (CRS) - EPSG 2163. Add both the new _2163 shapefiles by using the Layer >> Add Layer >> Add Vector Layer... command.
I added labels to each layer to understand what I'm looking at. You can show both the name and rating on nearby_2163 by using the expression concat( "location", ' | ', "rating"). Your map should look something like the following:
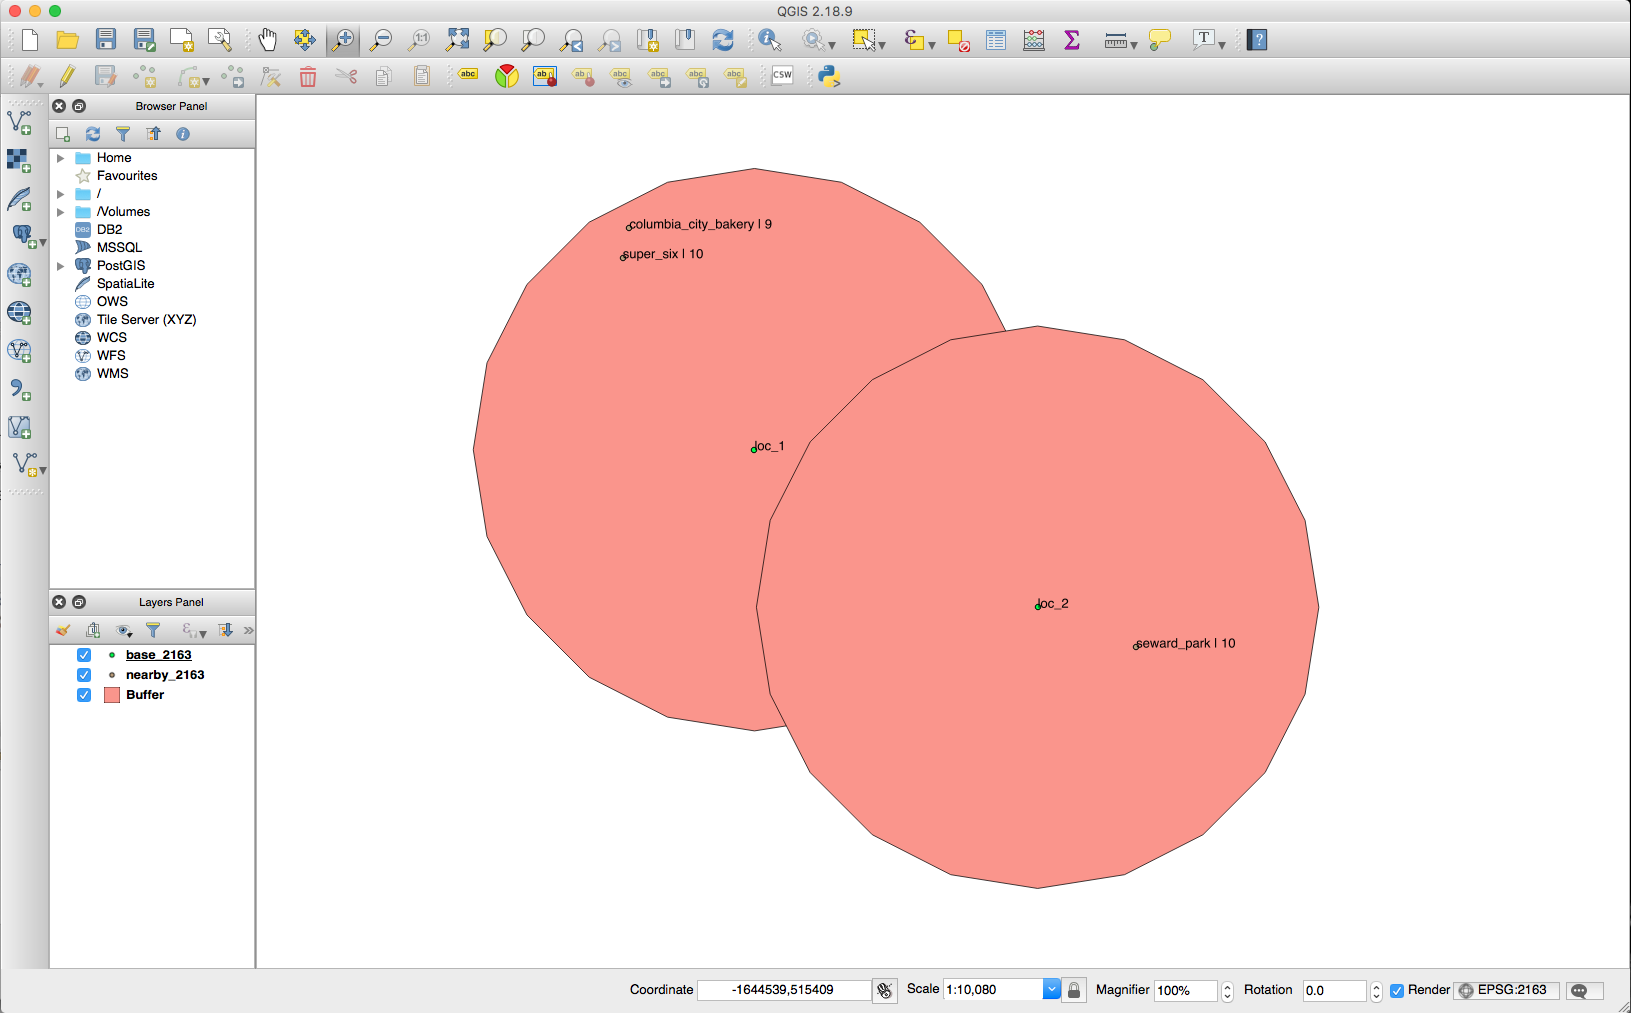
Step 6: Draw radius around landmarks
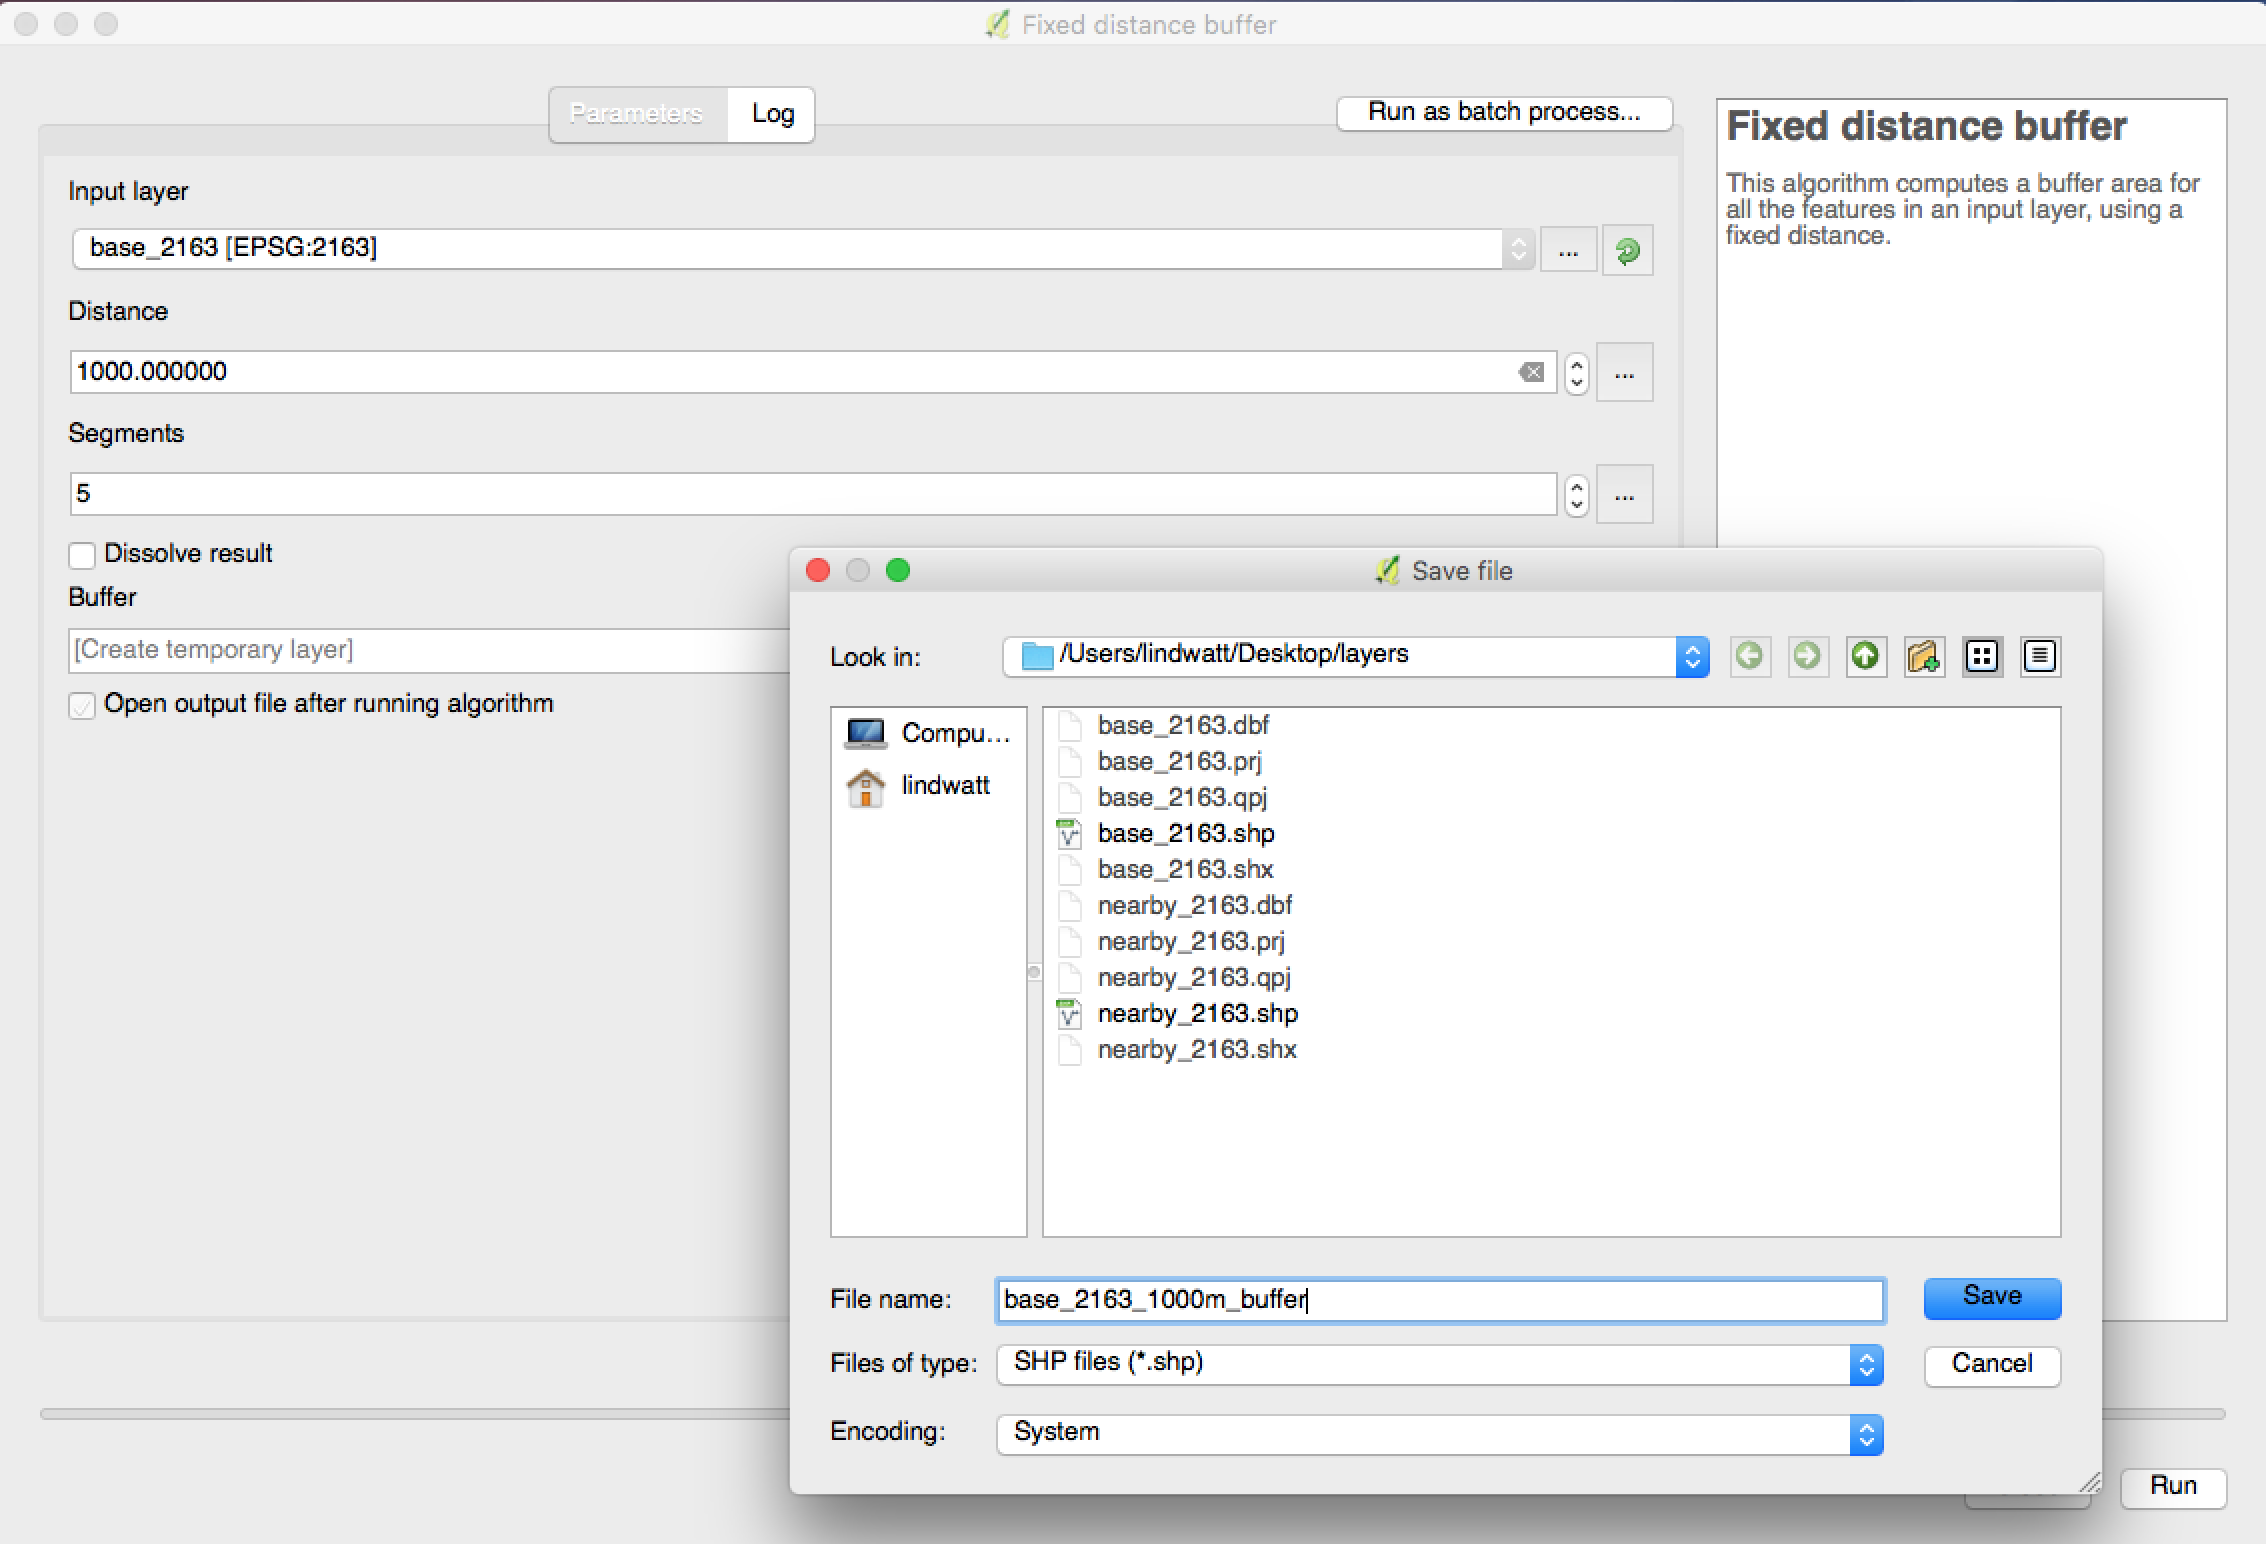
Use the command Vector >> Geoprocessing Tools >> Fixed Distance Buffer. Set your input layer as base_2163 (and verify that it says [EPSG:2163] next to it. Set your distance to a value in meters (I'm going to use 1,000 for a kilometer). Under "Buffer", save this a new shapefile by clicking the ... :
After you hit the "run" button and rearrange the layers on the map, you should see something like the following:
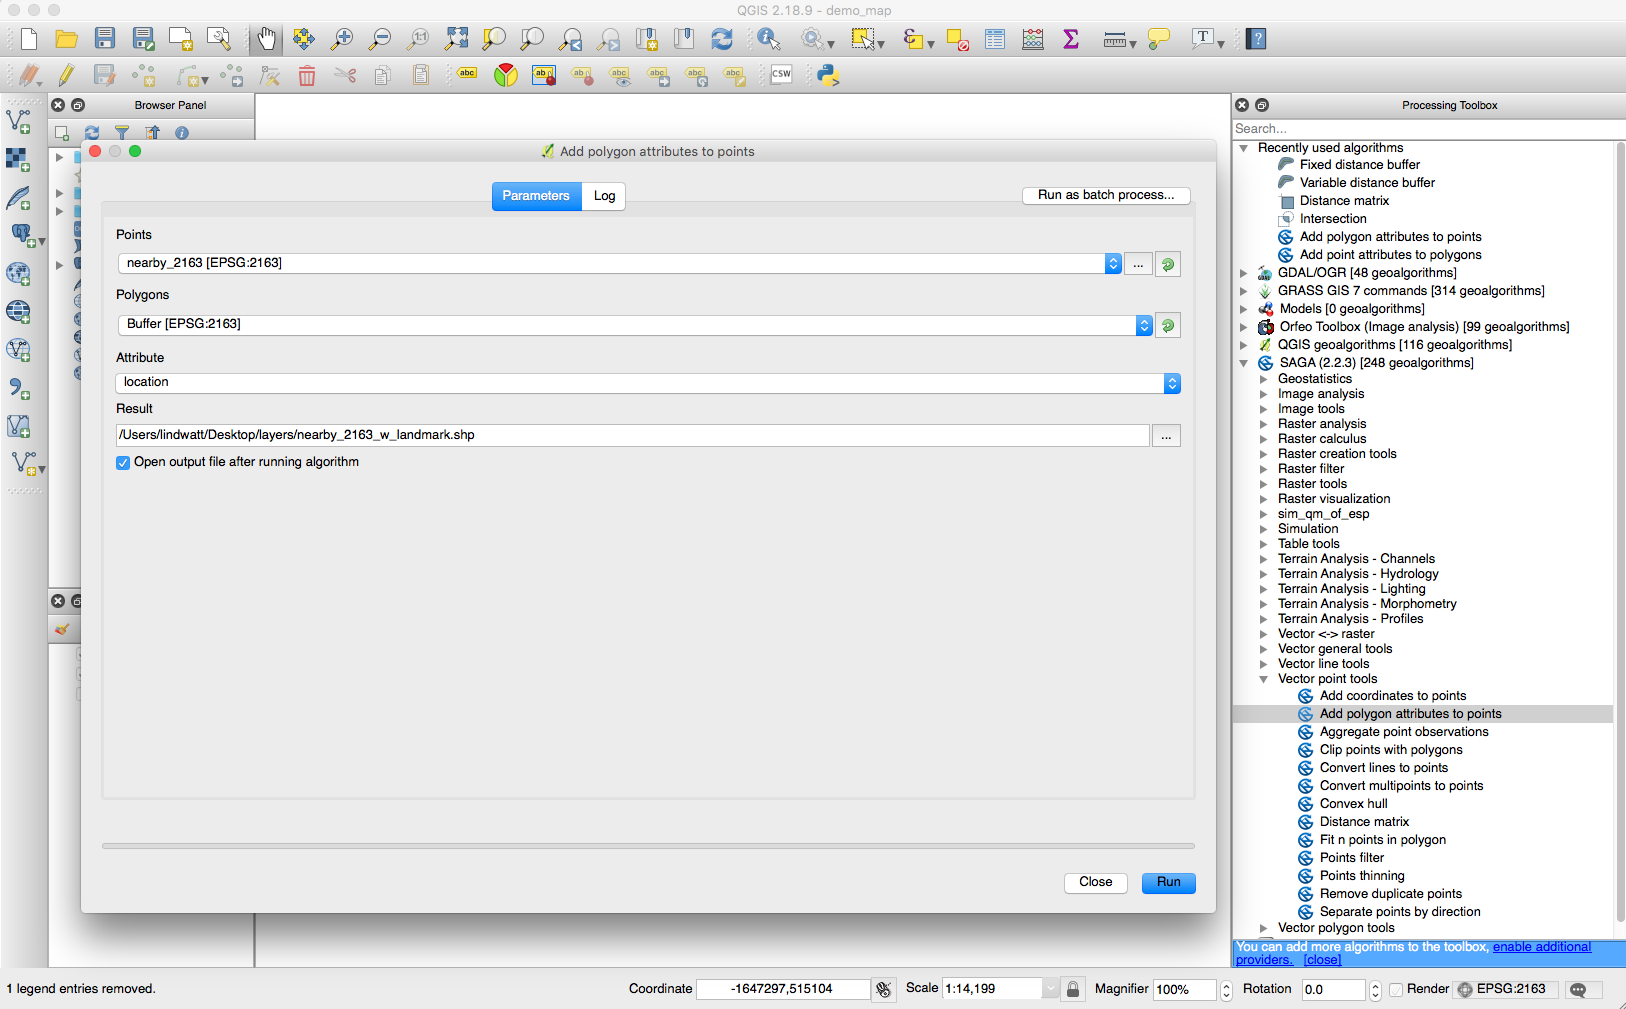
Step 7: Add landmark info to points of interest
This is where the magic happens. Go to Processing >> Toolbox and the click on SAGA (2.2.3) in the new right hand tab and open up "Vector Point Tools" and double click on "Add polygon attributes to points".
Your "Points" is nearby_2163 and you want to add the nearby landmark: set "Polygons" to Buffer and select the "Attribute" location. Per earlier, save the new layer as a file:
Your map now has a new layer called "Results" (or similar). Right click on the layer and select "Open Attributes Table" and you should see that each point now has the corresponding nearby location attached:

Step 8: Visualize or export
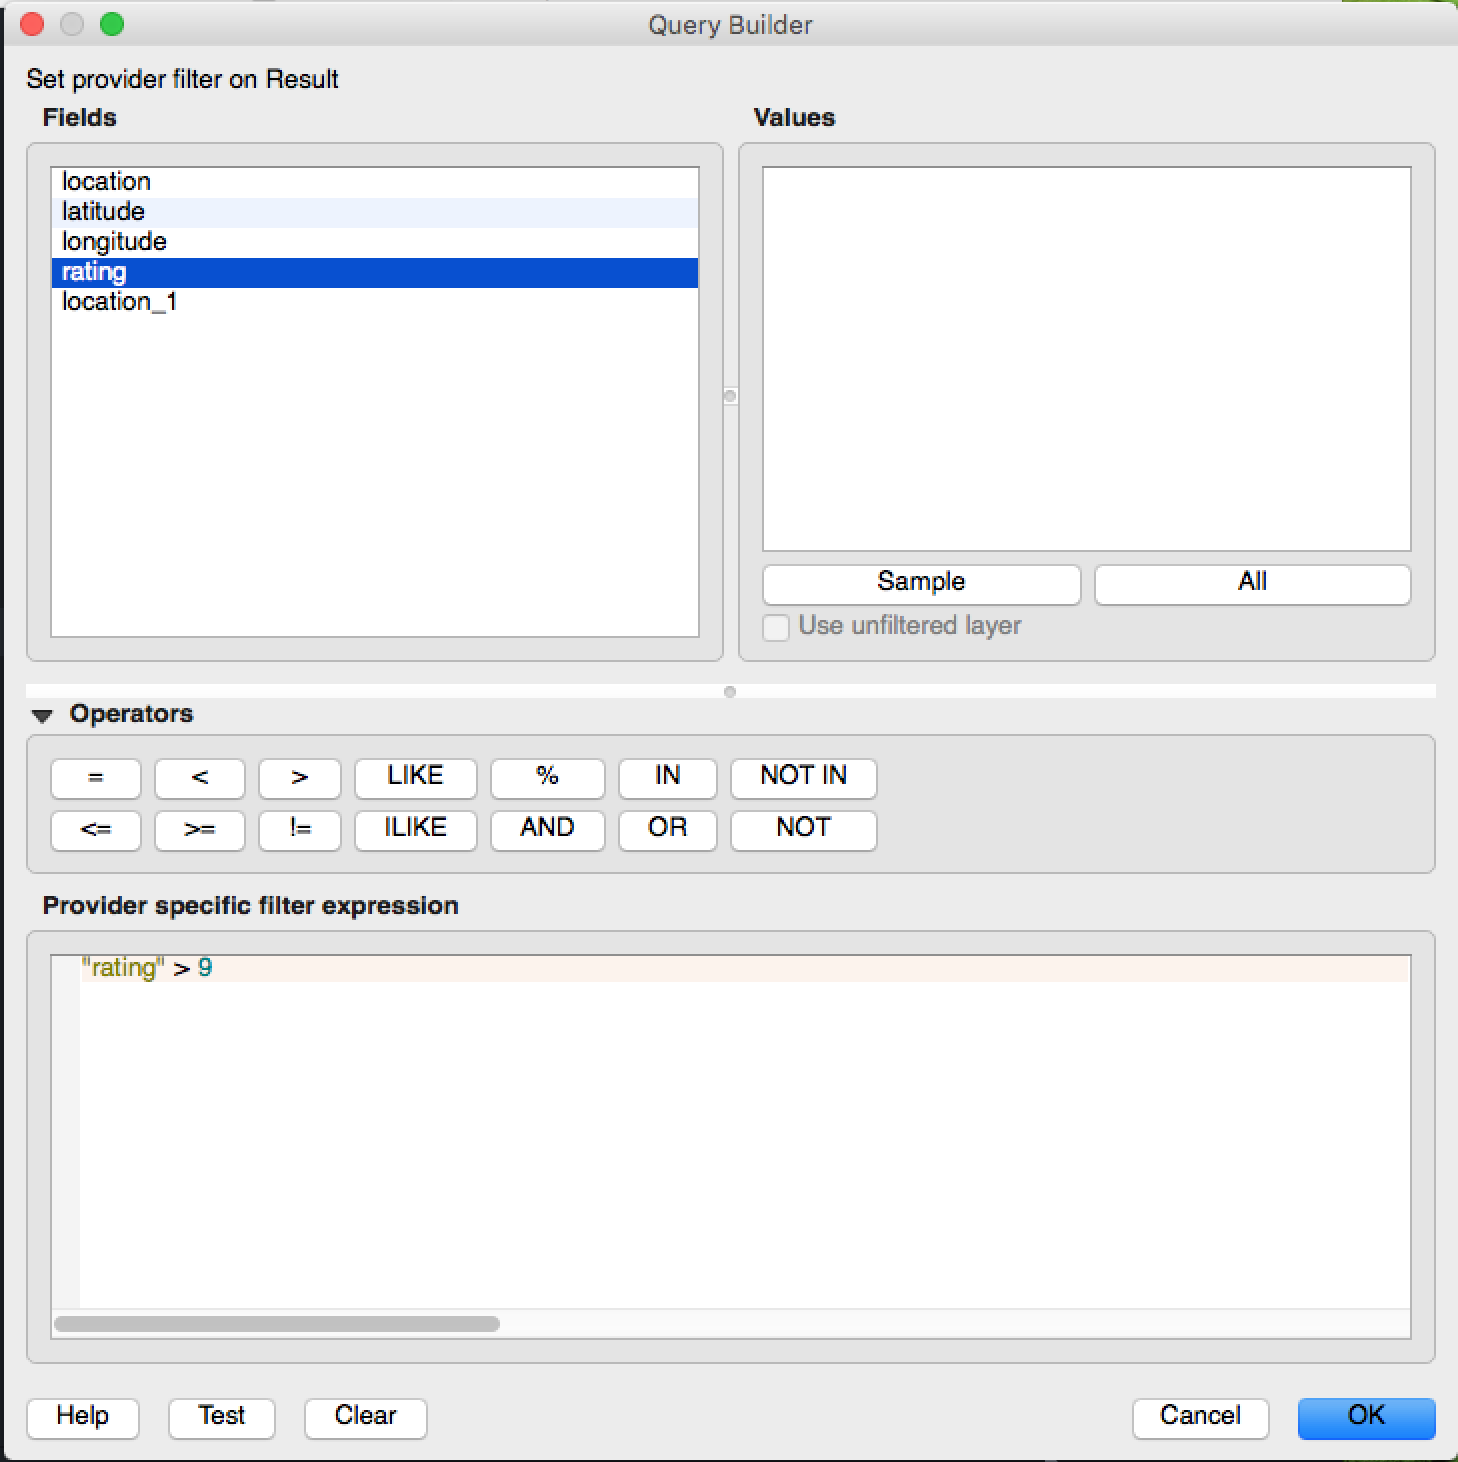
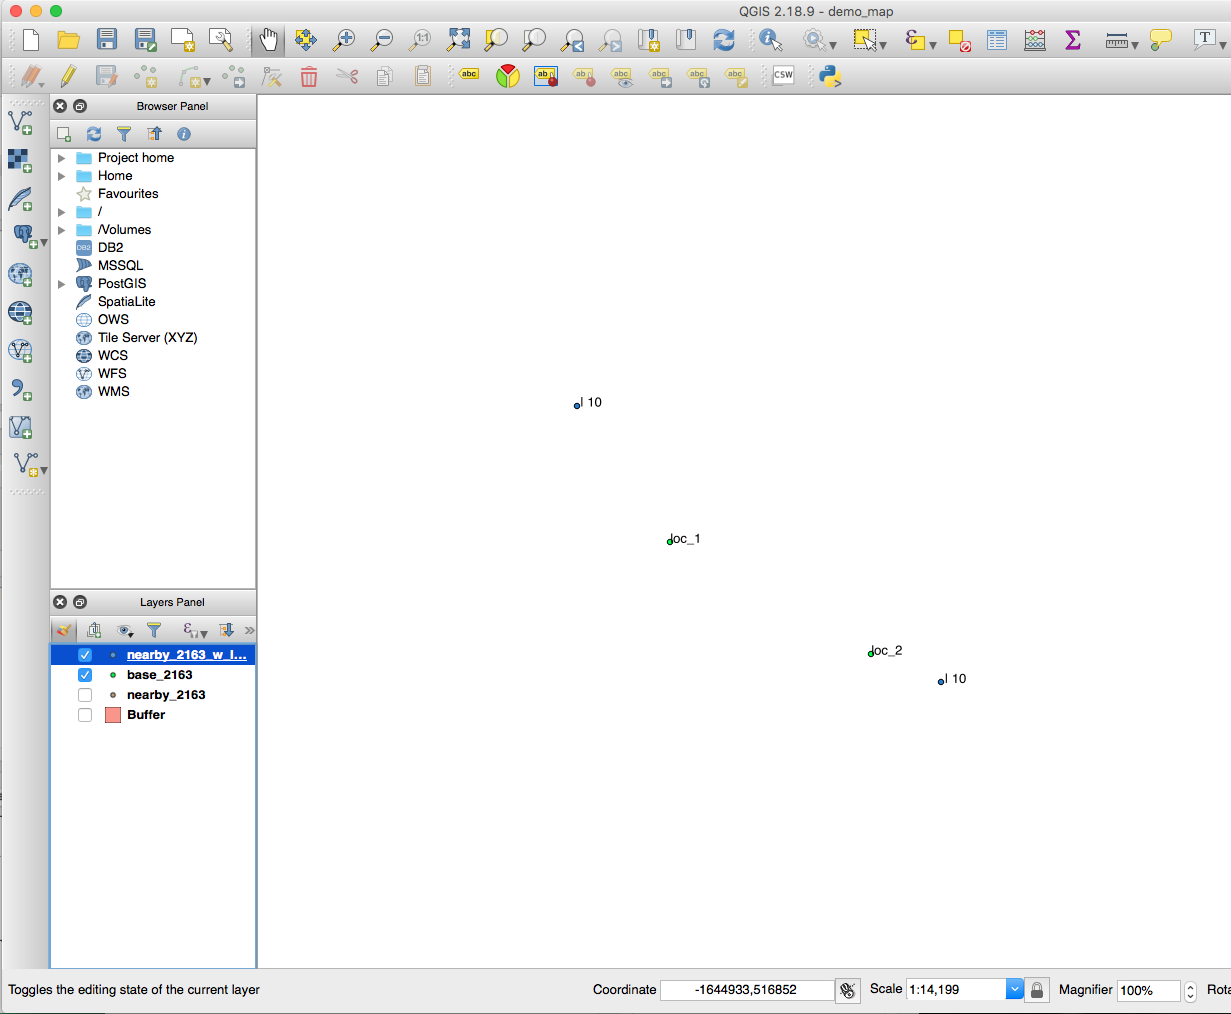
If you want to see a subset of ratings (e.g., 10 or above), then just right click on "Results" and select Filter... Set the value of ratings to above 9 and you'll see that one of our locations is now gone:
Here's the map. For some reason, the names aren't showing properly on the labels but you can see that only the places rated 10 are showing:
If you save the layer (right click) as an Excel spreadsheet, you'll get the values in a form you can play with: